reading-notes
https://faroukibrahim-fii.github.io/reading-notes/
React 4
Dynamic Routes
Download Starter Code (Optional)
If you’re NOT continuing from the previous lesson, you can download, install, and run the starter code for this lesson below. This sets up a nextjs-blog directory such that it’s identical to the result of the previous lesson.
Again, this is NOT necessary if you’ve just finished the previous lesson.
npx create-next-app nextjs-blog --use-npm --example "https://github.com/vercel/next-learn/tree/master/basics/dynamic-routes-starter"
Page Path Depends on External Data
In the previous lesson, we covered the case where the page content depends on external data. We used getStaticProps to fetch required data to render the index page.
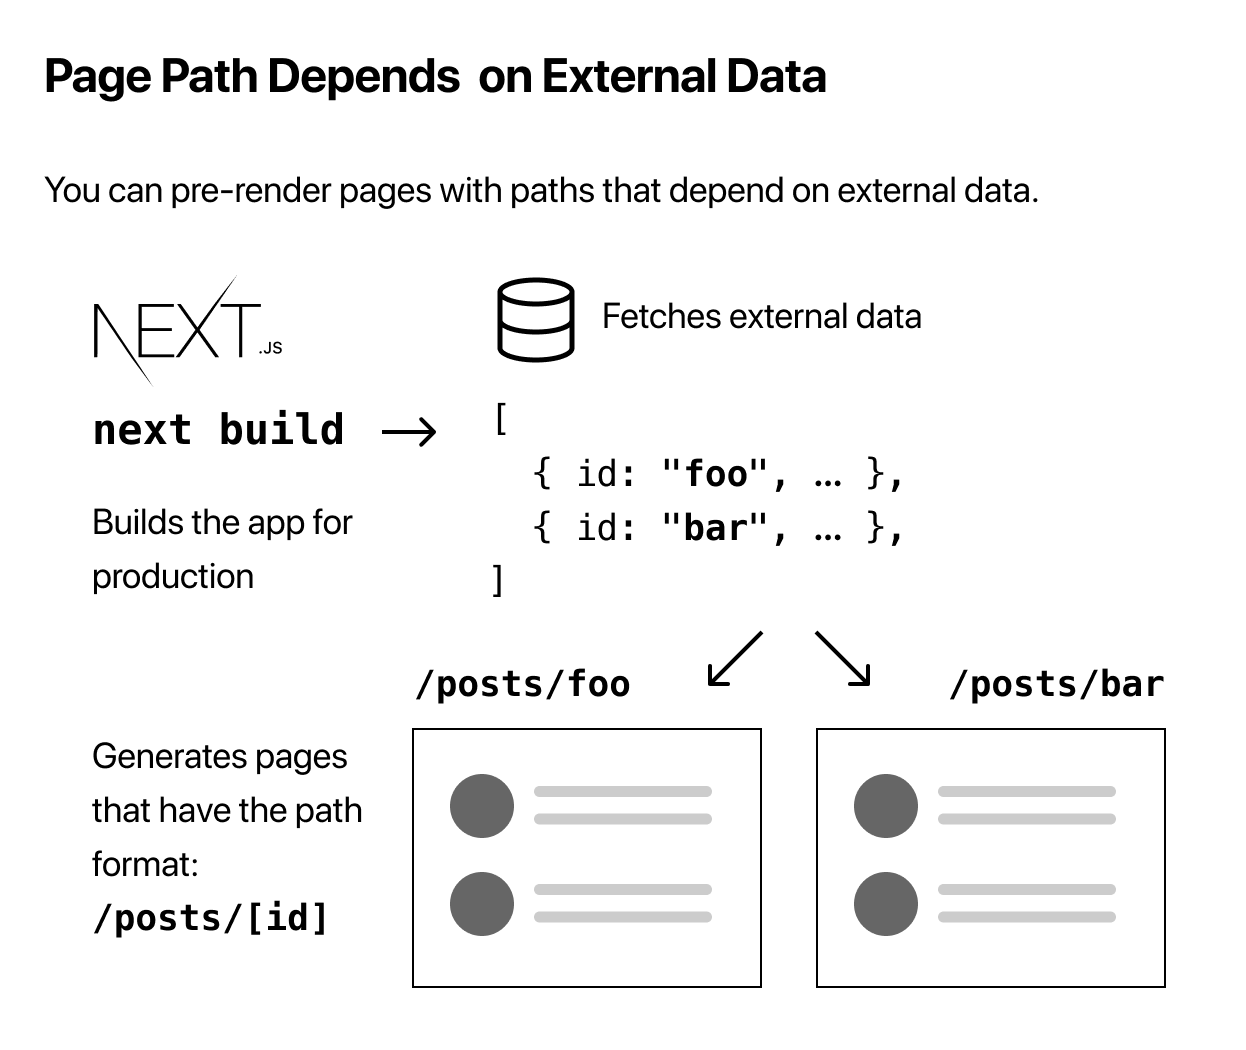
In this lesson, we’ll talk about the case where each page path depends on external data. Next.js allows you to statically generate pages with paths that depend on external data. This enables dynamic URLs in Next.js.

How to Statically Generate Pages with Dynamic Routes
In our case, we want to create dynamic routes for blog posts:
- We want each post to have the path
/posts/<id>, where<id>is the name of the markdown file under the top-levelpostsdirectory. Since we havessg-ssr.md andpre-rendering.md, we’d like the paths to be/posts/ssg-ssrand/posts/pre-rendering.
Implement getStaticPaths
First, let’s set up the files:
- Create a file called
[id].jsinside thepages/postsdirectory. - Also, remove
first-post.jsinside thepages/postsdirectory — we’ll no longer use this.
Then, open pages/posts/[id].js in your editor and paste the following code. We’ll fill in … later:
import Layout from '../../components/layout'

export default function Post() {
return <Layout>...</Layout>
}
Dynamic Routes
45 points Dynamic Routes Implement getStaticProps
We need to fetch necessary data to render the post with the given id.
To do so, open lib/posts.js again and add the following getPostData function at the bottom. It will return the post data based on id:
export function getPostData(id) {
const fullPath = path.join(postsDirectory, `${id}.md`)
const fileContents = fs.readFileSync(fullPath, 'utf8')

// Use gray-matter to parse the post metadata section
const matterResult = matter(fileContents)

// Combine the data with the id
return {
    id,
    ...matterResult.data
}
}
Render Markdown
To render markdown content, we’ll use the remark library. First, let’s install it:
npm install remark remark-html
Then, open lib/posts.js and add the following imports to the top of the file:
import { remark } from 'remark'
import html from 'remark-html'
Deploying Your Next.js App
Push to GitHub
Before we deploy, let’s push our Next.js app to GitHub if you haven’t done so already. This will make deployment easier.
- On your personal GitHub account, create a new repository called
nextjs-blog. - The repository can be public or private. You do not need to initialize it with a README or other files.
- If you need help setting up your repo, take a look at this guide on GitHub.
Then:
- If you haven’t initialized the git repository locally for your Next.js app, do so now.
- Push the Next.js app to your GitHub repository.
Deploy to Vercel
The easiest way to deploy Next.js to production is to use the Vercel platform developed by the creators of Next.js.
Vercel is a serverless platform for static and hybrid applications built to integrate with your headless content, commerce, or database. We make it easy for frontend teams to develop, preview, and ship delightful user experiences, where performance is the default. You can start using it for free — no credit card required.
Create a Vercel Account
First, go to https://vercel.com/signup to create a Vercel account. Choose Continue with GitHub and go through the sign up process.
Next.js and Vercel
Vercel is made by the creators of Next.js and has first-class support for Next.js. When you deploy your Next.js app to Vercel, the following happens by default:
- Pages that use Static Generation and assets (JS, CSS, images, fonts, etc) will automatically be served from the Vercel Edge Network, which is blazingly fast.
- Pages that use Server-Side Rendering and API routes will automatically become isolated Serverless Functions. This allows page rendering and API requests to scale infinitely.
Vercel has many more features, such as:
- Custom Domains: Once deployed on Vercel, you can assign a custom domain to your Next.js app. Take a look at our documentation here.
- Environment Variables: You can also set environment variables on Vercel. Take a look at our documentation here. You can then use those environment variables in your Next.js app.
- Automatic HTTPS: HTTPS is enabled by default (including custom domains) and doesn’t require extra configuration. We auto-renew SSL certificates.
Develop, Preview, Ship
We’ve just gone through the workflow we call DPS: Develop, Preview, and Ship.
- Develop: We’ve written code in Next.js and used the Next.js development server running to take advantage of its hot reloading feature.
- Preview: We’ve pushed changes to a branch on GitHub, and Vercel created a preview deployment that’s available via a URL. We can share this preview URL with others for feedback. In addition to doing code reviews, you can do deployment previews.
- Ship: We’ve merged the pull request to
mainto ship to production.
Other Hosting Options
Next.js can be deployed to any hosting provider that supports Node.js.
If you’ve followed the instructions so far, your package.json should have the following build and start scripts:
{
"scripts": {
    "dev": "next",
    "build": "next build",
    "start": "next start"
}
}
In your own hosting provider, run the build script once, which builds the production application in the .next folder.
npm run build
After building, the start script starts a Node.js server that supports hybrid pages, serving both statically generated and server-side rendered pages, and API Routes.
npm run start