reading-notes
https://faroukibrahim-fii.github.io/reading-notes/
API Deployment
Configuring Django Settings: Best Practices
Managing Django Settings: Issues
Different environments.
Usually, you have several environments: local, dev, ci, qa, staging, production, etc. Each environment can have its own specific settings (for example: DEBUG = True, more verbose logging, additional apps, some mocked data, etc).
Sensitive data.
You have SECRET_KEY in each Django project. On top of this there can be DB passwords and tokens for third-party APIs.
Sharing settings between team members.
You need a general approach to eliminate human error when working with the settings.
Django settings are a Python code.
This is a curse and a blessing at the same time. It gives you a lot of flexibility, but can also be a problem – instead of key-value pairs, settings.py can have a very tricky logic.
settings_local.py
This is the oldest method. I used it when I was configuring a Django project on a production server for the first time. I saw a lot of people use it back in the day, and I still see it now.
settings.py file:
ALLOWED_HOSTS = ['example.com']
DEBUG = False
DATABASES = {
    'default': {
        'ENGINE': 'django.db.backends.postgresql',
        'NAME': 'production_db',
        'USER': 'user',
        'PASSWORD': 'password',
        'HOST': 'db.example.com',
        'PORT': '5432',
        'OPTIONS': {
            'sslmode': 'require'
        }
    }
}

...

from .settings_local import *
settings_local.py file:
ALLOWED_HOSTS = ['localhost']
DEBUG = True
DATABASES = {
    'default': {
        'ENGINE': 'django.db.backends.postgresql',
        'NAME': 'local_db',
        'HOST': '127.0.0.1',
        'PORT': '5432',
    }
}
Pros:
- Secrets not in VCS.
Cons:
- settings_local.py is not in VCS, so you can lose some of your Django environment settings.
- The Django settings file is a Python code, so settings_local.py can have some non-obvious logic.
- You need to have settings_local.example (in VCS) to share the default configurations for developers.
django-environ
Based on the above, we see that environment variables are the perfect place to store settings.
settings.py file before:
import os


SITE_ROOT = os.path.dirname(os.path.dirname(os.path.dirname(os.path.realpath(__file__))))

DEBUG = True
TEMPLATE_DEBUG = DEBUG

DATABASES = {
    'default': {
        'ENGINE': 'django.db.backends.postgresql',
        'NAME': 'production_db',
        'USER': 'user',
        'PASSWORD': 'password',
        'HOST': 'db.example.com',
        'PORT': '5432',
        'OPTIONS': {
            'sslmode': 'require'
        }
    }
}

MEDIA_ROOT = os.path.join(SITE_ROOT, 'assets')
MEDIA_URL = 'media/'
STATIC_ROOT = os.path.join(SITE_ROOT, 'static')
STATIC_URL = 'static/'

SECRET_KEY = 'Some-Autogenerated-Secret-Key'

CACHES = {
    'default': {
        'BACKEND': 'django_redis.cache.RedisCache',
        'LOCATION': '127.0.0.1:6379/1',
    }
}
settings.py file after:
import environ


root = environ.Path(__file__) - 3  # get root of the project
env = environ.Env()
environ.Env.read_env()  # reading .env file

SITE_ROOT = root()

DEBUG = env.bool('DEBUG', default=False)
TEMPLATE_DEBUG = DEBUG

DATABASES = {'default': env.db('DATABASE_URL')}

public_root = root.path('public/')
MEDIA_ROOT = public_root('media')
MEDIA_URL = env.str('MEDIA_URL', default='media/')
STATIC_ROOT = public_root('static')
STATIC_URL = env.str('STATIC_URL', default='static/')

SECRET_KEY = env.str('SECRET_KEY')

CACHES = {'default': env.cache('REDIS_CACHE_URL')}
.env file:
DEBUG=True
DATABASE_URL=postgres://user:password@db.example.com:5432/production_db?sslmode=require
REDIS_CACHE_URL=redis://user:password@cache.example.com:6379/1
SECRET_KEY=Some-Autogenerated-Secret-Key
Setting Structure
Instead of splitting settings by environments, you can split them by the source: Django, third- party apps (Celery, DRF, etc.), and your custom settings.
project/
├── apps/
├── settings/
│   ├── __init__.py
│   ├── djano.py
│   ├── project.py
│   └── third_party.py
└── manage.py
Naming Conventions
Naming of variables is one of the most complex parts of development. So is naming of settings. We can’t imply on Django or third-party applications, but we can follow these simple rules for our custom (project) settings:
- Give meaningful names to your settings.
- Always use the prefix with the project name for your custom (project) settings.
- Write descriptions for your settings in comments.
Django Settings: Best practices
- Keep settings in environment variables.
- Write default values for production configuration (excluding secret keys and tokens).
- Don’t hardcode sensitive settings, and don’t put them in VCS.
- Split settings into groups: Django, third-party, project.
- Follow naming conventions for custom (project) settings.
What is SSH
SSH, or Secure Shell, is a remote administration protocol that allows users to control and modify their remote servers over the Internet. The service was created as a secure replacement for the unencrypted Telnet and uses cryptographic techniques to ensure that all communication to and from the remote server happens in an encrypted manner.
How Does SSH Work
If you’re using Linux or Mac, then using SSH is very simple. If you use Windows, you will need to utilize an SSH client to open SSH connections. The most popular SSH client is PuTTY, which you can learn more about here.
For Mac and Linux users, head over to your terminal program and then follow the procedure below:
The SSH command consists of 3 distinct parts:
ssh {user}@{host}
Understanding Different Encryption Techniques
The significant advantage offered by SSH over its predecessors is the use of encryption to ensure secure transfer of information between the host and the client. Host refers to the remote server you are trying to access, while the client is the computer you are using to access the host. There are three different encryption technologies used by SSH:
- Symmetrical encryption
- Asymmetrical encryption
- Hashing.
Symmetric Encryption
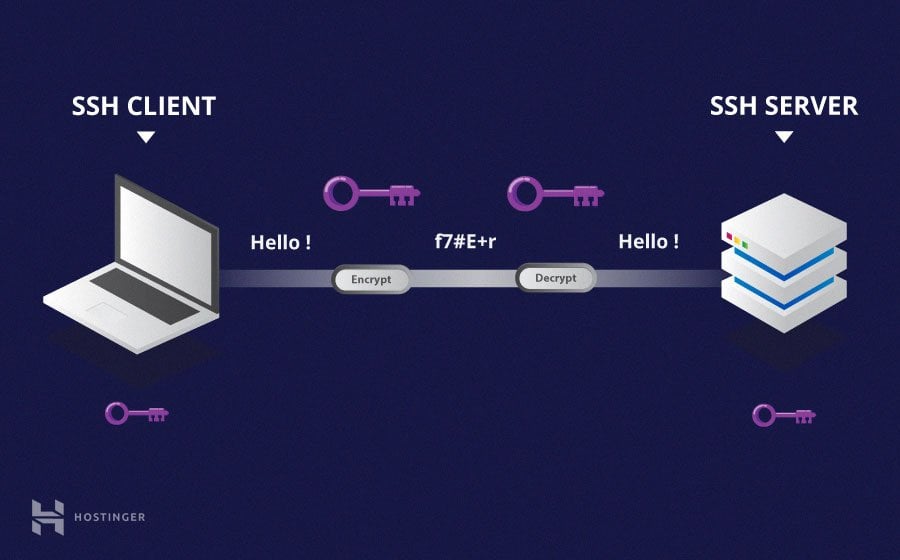
Symmetric encryption is a form of encryption where a secret key is used for both encryption and decryption of a message by both the client and the host. Effectively, any one possessing the key can decrypt the message being transferred.

Asymmetric Encryption
Unlike symmetrical encryption, asymmetrical encryption uses two separate keys for encryption and decryption. These two keys are known as the public key and the private key. Together, both these keys form a public-private key pair.

Hashing
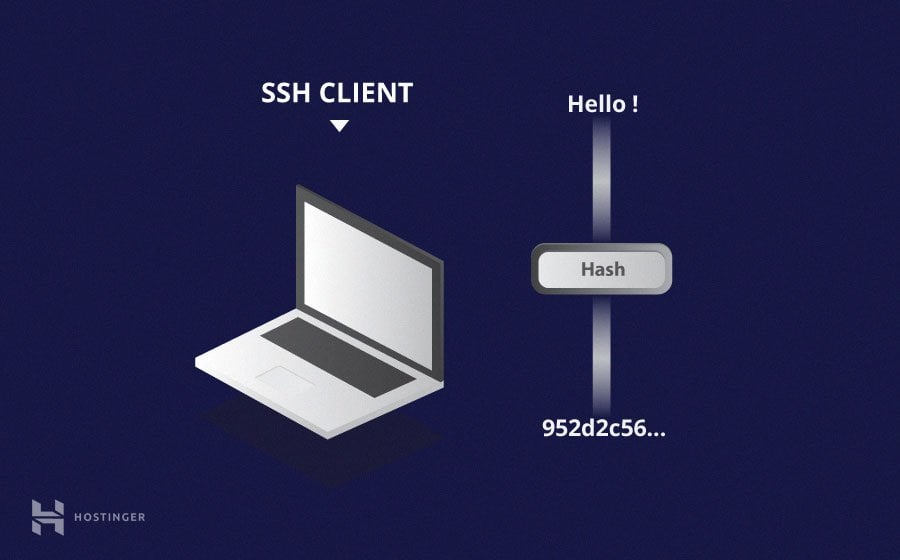
One-way hashing is another form of cryptography used in Secure Shell Connections. One-way-hash functions differ from the above two forms of encryption in the sense that they are never meant to be decrypted. They generate a unique value of a fixed length for each input that shows no clear trend which can exploited. This makes them practically impossible to reverse.

How Does SSH Work with These Encryption Techniques
The way SSH works is by making use of a client-server model to allow for authentication of two remote systems and encryption of the data that passes between them.
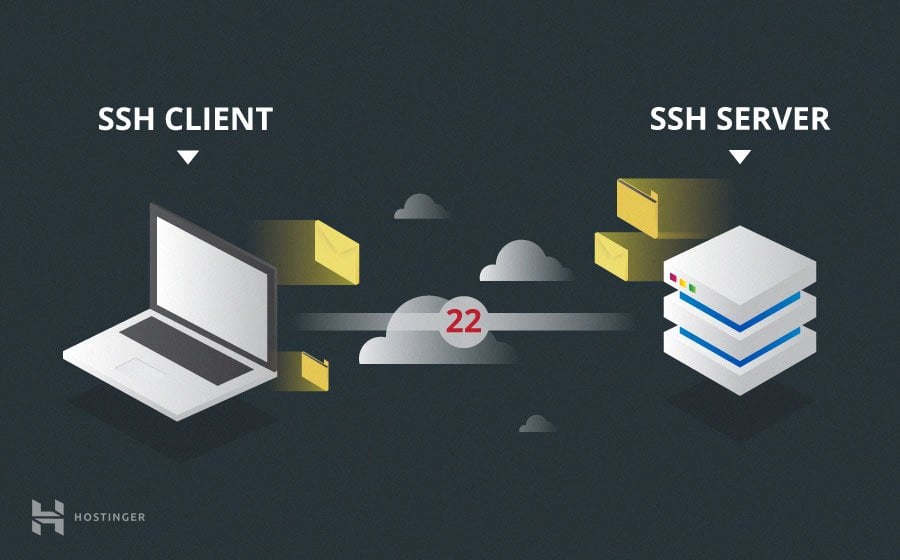
SSH operates on TCP port 22 by default (though this can be changed if needed). The host (server) listens on port 22 (or any other SSH assigned port) for incoming connections. It organizes the secure connection by authenticating the client and opening the correct shell environment if the verification is successful.

Authenticating the User
The final stage before the user is granted access to the server is authenticating his/her credentials. For this, most SSH users use a password. The user is asked to enter the username, followed by the password. These credentials securely pass through the symmetrically encrypted tunnel, so there is no chance of them being captured by a third party.