reading-notes
https://faroukibrahim-fii.github.io/reading-notes/
Authentication & Production Server
Introduction to JSON Web Tokens
JSON Web Token (JWT) is an open standard (RFC 7519) that defines a compact and self-contained way for securely transmitting information between parties as a JSON object. This information can be verified and trusted because it is digitally signed. JWTs can be signed using a secret (with the HMAC algorithm) or a public/private key pair using RSA or ECDSA.
When should you use JSON Web Tokens?
Here are some scenarios where JSON Web Tokens are useful:
-
Authorization: This is the most common scenario for using JWT. Once the user is logged in, each subsequent request will include the JWT, allowing the user to access routes, services, and resources that are permitted with that token.
-
Information Exchange: JSON Web Tokens are a good way of securely transmitting information between parties.
What is the JSON Web Token structure?
In its compact form, JSON Web Tokens consist of three parts separated by dots (.), which are:
- Header
- Payload
- Signature
Therefore, a JWT typically looks like the following.
xxxxx.yyyyy.zzzzz
Header
The header typically consists of two parts: the type of the token, which is JWT, and the signing algorithm being used, such as HMAC SHA256 or RSA.
{
"alg": "HS256",
"typ": "JWT"
}
Payload
The second part of the token is the payload, which contains the claims. Claims are statements about an entity (typically, the user) and additional data.
- Registered claims: These are a set of predefined claims which are not mandatory but recommended, to provide a set of useful, interoperable claims.
- Public claims: These can be defined at will by those using JWTs. But to avoid collisions they should be defined in the IANA JSON Web Token Registry or be defined as a URI that contains a collision resistant namespace.
-
Private claims: These are the custom claims created to share information between parties that agree on using them and are neither registered or public claims.
  {
  "sub": "1234567890",
  "name": "John Doe",
  "admin": true
  }
Signature
To create the signature part you have to take the encoded header, the encoded payload, a secret, the algorithm specified in the header, and sign that.
HMACSHA256(
base64UrlEncode(header) + "." +
base64UrlEncode(payload),
secret)
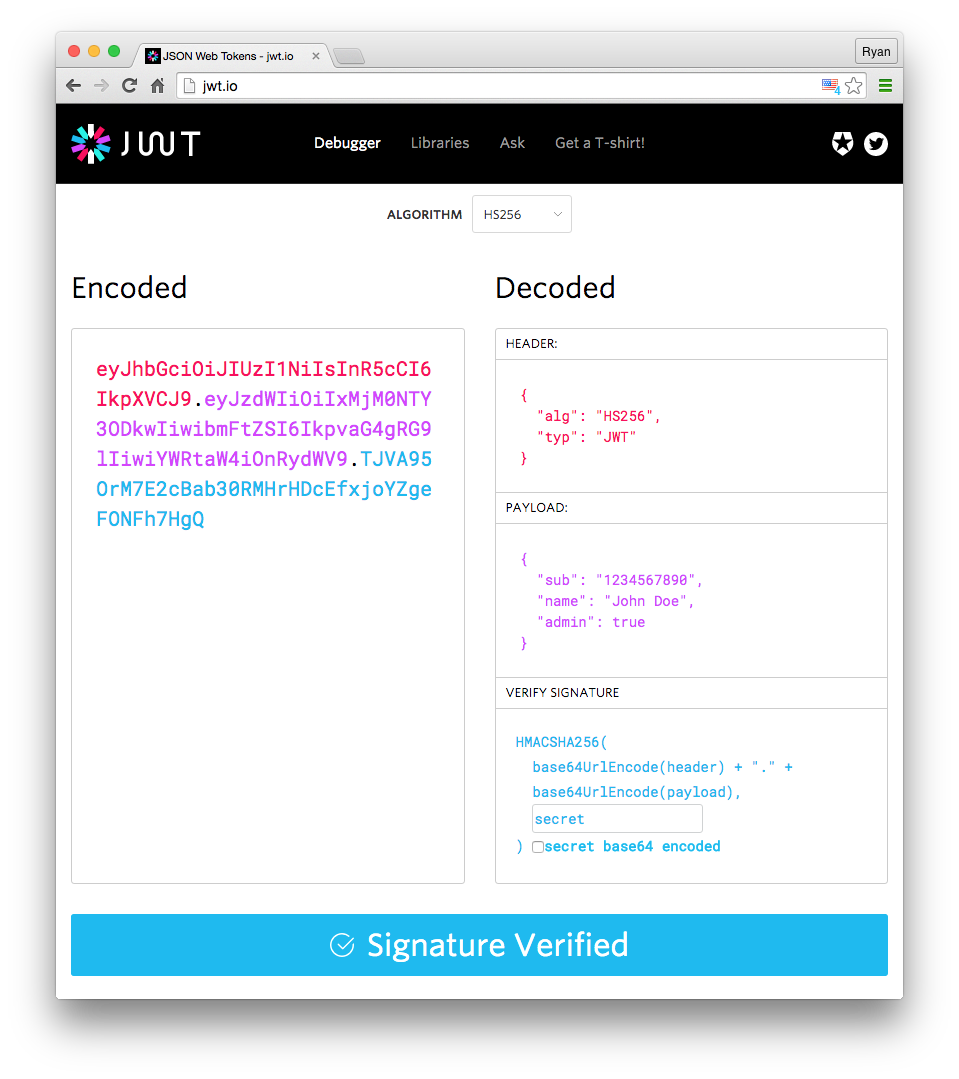
How do JSON Web Tokens work?
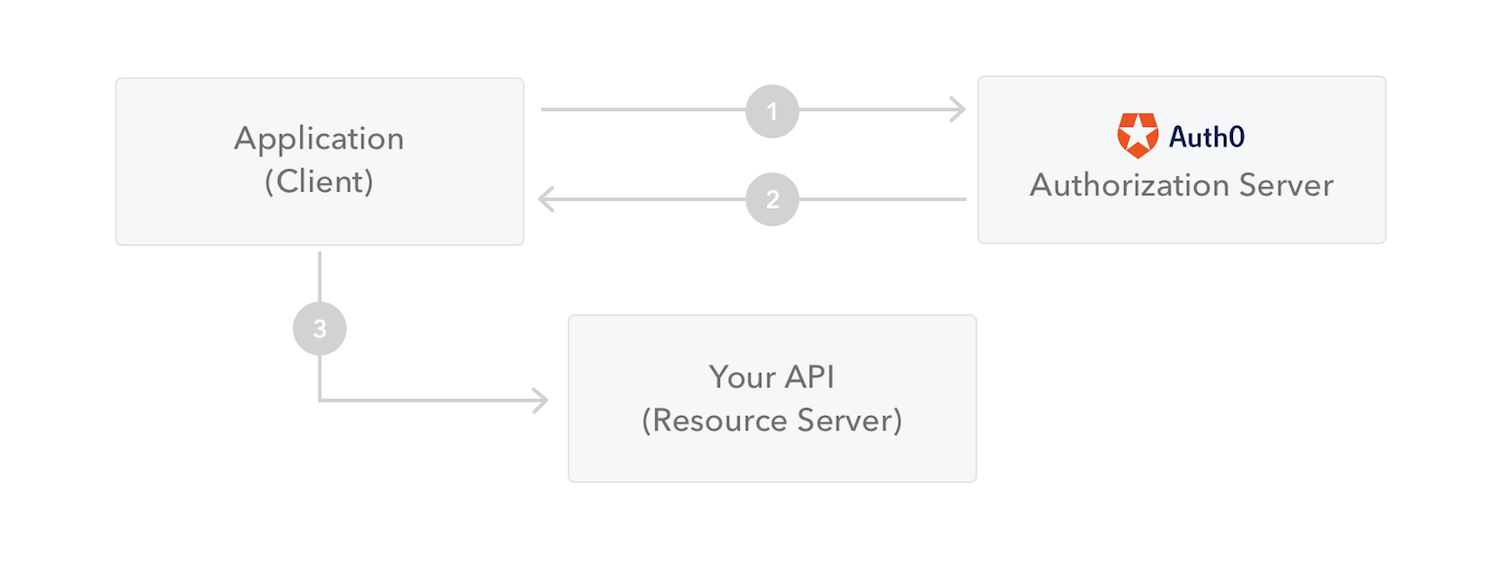
In authentication, when the user successfully logs in using their credentials, a JSON Web Token will be returned. Since tokens are credentials, great care must be taken to prevent security issues. In general, you should not keep tokens longer than required.
Authorization: Bearer <token>
Why should we use JSON Web Tokens?
Let’s talk about the benefits of JSON Web Tokens (JWT) when compared to Simple Web Tokens (SWT) and Security Assertion Markup Language Tokens (SAML).
As JSON is less verbose than XML, when it is encoded its size is also smaller, making JWT more compact than SAML. This makes JWT a good choice to be passed in HTML and HTTP environments.
Security-wise, SWT can only be symmetrically signed by a shared secret using the HMAC algorithm. However, JWT and SAML tokens can use a public/private key pair in the form of a X.509 certificate for signing. Signing XML with XML Digital Signature without introducing obscure security holes is very difficult when compared to the simplicity of signing JSON.
How to Use JWT Authentication with Django REST Framework
JWT stand for JSON Web Token and it is an authentication strategy used by client/server applications where the client is a Web application using JavaScript and some frontend framework like Angular, React or VueJS.
How JWT Works?
The JWT is just an authorization token that should be included in all requests:
curl http://127.0.0.1:8000/hello/ -H 'Authorization: Bearer eyJ0eXAiOiJKV1QiLCJhbGciOiJIUzI1NiJ9.eyJ0b2tlbl90eXBlIjoiYWNjZXNzIiwiZXhwIjoxNTQzODI4NDMxLCJqdGkiOiI3ZjU5OTdiNzE1MGQ0NjU3OWRjMmI0OTE2NzA5N2U3YiIsInVzZXJfaWQiOjF9.Ju70kdcaHKn1Qaz8H42zrOYk0Jx9kIckTn9Xx7vhikY'
The JWT is acquired by exchanging an username + password for an access token and an refresh token.
The access token is usually short-lived (expires in 5 min or so, can be customized though).
Installation & Setup
For this tutorial we are going to use the djangorestframework_simplejwt library, recommended by the DRF developers.
pip install djangorestframework_simplejwt
settings.py
REST_FRAMEWORK = {
    'DEFAULT_AUTHENTICATION_CLASSES': [
        'rest_framework_simplejwt.authentication.JWTAuthentication',
    ],
}
urls.py
from django.urls import path
from rest_framework_simplejwt import views as jwt_views

urlpatterns = [
    # Your URLs...
    path('api/token/', jwt_views.TokenObtainPairView.as_view(), name='token_obtain_pair'),
    path('api/token/refresh/', jwt_views.TokenRefreshView.as_view(), name='token_refresh'),
]
Usage
I will be using HTTPie to consume the API endpoints via the terminal. But you can also use cURL (readily available in many OS) to try things out locally.
Obtain Token
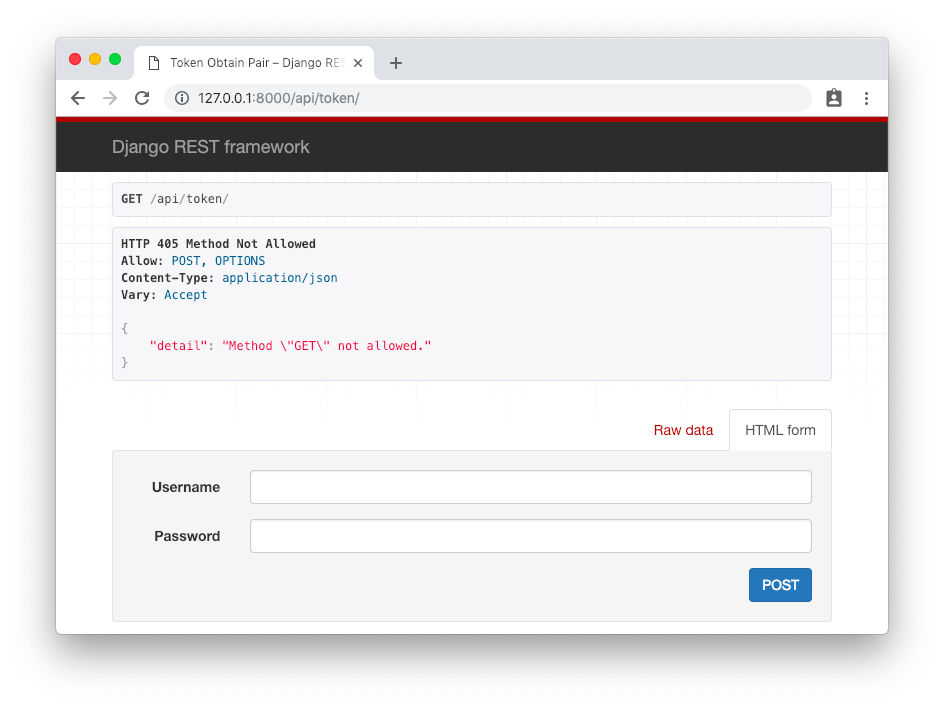
First step is to authenticate and obtain the token. The endpoint is /api/token/ and it only accepts POST requests.
http post http://127.0.0.1:8000/api/token/ username=vitor password=123
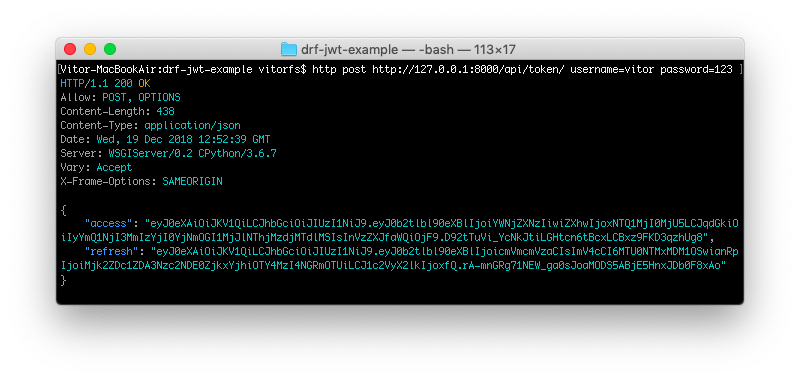
Refresh Token
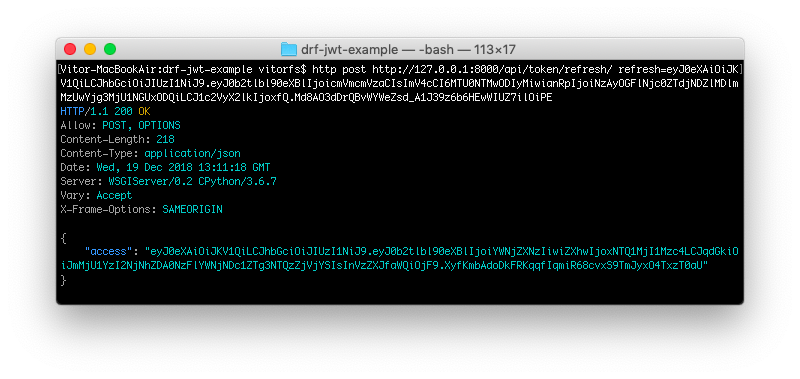
To get a new access token, you should use the refresh token endpoint /api/token/refresh/ posting the refresh token:
http post http://127.0.0.1:8000/api/token/refresh/ refresh=eyJ0eXAiOiJKV1QiLCJhbGciOiJIUzI1NiJ9.eyJ0b2tlbl90eXBlIjoicmVmcmVzaCIsImV4cCI6MTU0NTMwODIyMiwianRpIjoiNzAyOGFlNjc0ZTdjNDZlMDlmMzUwYjg3MjU1NGUxODQiLCJ1c2VyX2lkIjoxfQ.Md8AO3dDrQBvWYWeZsd_A1J39z6b6HEwWIUZ7ilOiPE
What’s The Point of The Refresh Token?
At first glance the refresh token may look pointless, but in fact it is necessary to make sure the user still have the correct permissions. If your access token have a long expire time, it may take longer to update the information associated with the token. That’s because the authentication check is done by cryptographic means, instead of querying the database and verifying the data. So some information is sort of cached.
Django Runserver Is Not Your Production Server
A Production Stack
You want to only use tech in production, which is reliable, well tested and has been around for a while.
A production setup usually consists of multiple components, each designed and built to be really good at one specific thing. They are fast, reliable and very focused.
When a request arrives at your server, it should be passed to a dedicated web server. Nginx is an example for a good web server.
When a request arrives at your server, it should be passed to a dedicated web server. Nginx is an example for a good web server.
This is an application, which is great at serving static files from disk (your css and js files for example) and handling multiple requests at once. If the request is not for a static file, but should be processed by your application, the webserver is configured to pass this request to the next component.
How Does Django Fit In?
Your Django app does not actually run as you would think a server would - waiting for requests and reacting to them. Your project provides a uwsgi.py file, which contains a function to be called by the application server. This function gets a Python object representing the incoming request.