reading-notes
https://faroukibrahim-fii.github.io/reading-notes/
Django Models
Using models
Designing the LocalLibrary models
Before you jump in and start coding the models, it’s worth taking a few minutes to think about what data we need to store and the relationships between the different objects.
We know that we need to store information about books (title, summary, author, written language, category, ISBN) and that we might have multiple copies available (with globally unique id, availability status, etc.). We might need to store more information about the author than just their name, and there might be multiple authors with the same or similar names. We want to be able to sort information based on book title, author, written language, and category.
Model primer
Model definition
Models are usually defined in an application’s models.py file. They are implemented as subclasses of django.db.models.Model, and can include fields, methods and metadata.
Fields
A model can have an arbitrary number of fields, of any type — each one represents a column of data that we want to store in one of our database tables.
Metadata
You can declare model-level metadata for your Model by declaring class Meta, as shown.
class Meta:

    ordering = ['-my_field_name']
One of the most useful features of this metadata is to control the default ordering of records returned when you query the model type. You do this by specifying the match order in a list of field names to the ordering attribute, as shown above. The ordering will depend on the type of field (character fields are sorted alphabetically, while date fields are sorted in chronological order). As shown above, you can prefix the field name with a minus symbol (-) to reverse the sorting order.
Methods
A model can also have methods.
Minimally, in every model you should define the standard Python class method str() to return a human-readable string for each object.
Model management
Once you’ve defined your model classes you can use them to create, update, or delete records, and to run queries to get all records or particular subsets of records.
Creating and modifying records
To create a record you can define an instance of the model and then call save().
# Create a new record using the model's constructor.
record = MyModelName(my_field_name="Instance #1")

# Save the object into the database.
record.save()
Defining the LocalLibrary Models
In this section we will start defining the models for the library. Open models.py (in /locallibrary/catalog/). The boilerplate at the top of the page imports the models module
Genre model
Copy the Genre model code shown below and paste it into the bottom of your models.py file. This model is used to store information about the book category — for example whether it is fiction or non-fiction, romance or military history, etc.
Book model
Copy the Book model below and again paste it into the bottom of your file. The Book model represents all information about an available book in a general sense, but not a particular physical “instance” or “copy” available for loan.
BookInstance model
Next, copy the BookInstance model (shown below) under the other models. The BookInstance represents a specific copy of a book that someone might borrow, and includes information about whether the copy is available or on what date it is expected back, “imprint” or version details, and a unique id for the book in the library.
Django admin site
Registering models
First, open admin.py in the catalog application (/locallibrary/catalog/admin.py). It currently looks like this — note that it already imports django.contrib.admin:
from django.contrib import admin

# Register your models here.
Creating a superuser
In order to log into the admin site, we need a user account with Staff status enabled. In order to view and create records we also need this user to have permissions to manage all our objects. You can create a “superuser” account that has full access to the site and all needed permissions using manage.py.
Logging in and using the site
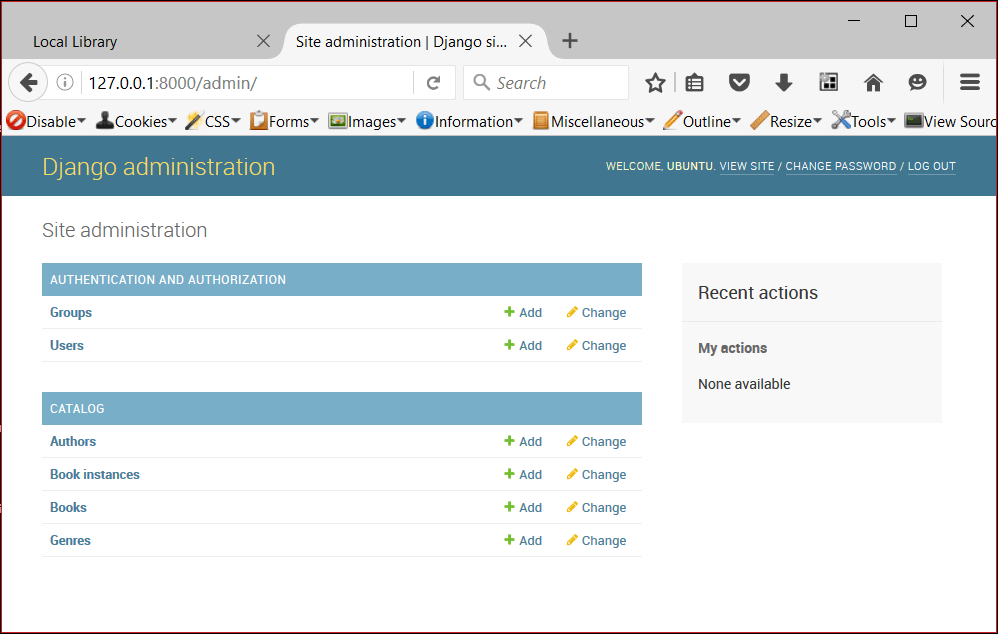
To login to the site, open the /admin URL (e.g. http://127.0.0.1:8000/admin) and enter your new superuser userid and password credentials (you’ll be redirected to the login page, and then back to the /admin URL after you’ve entered your details).
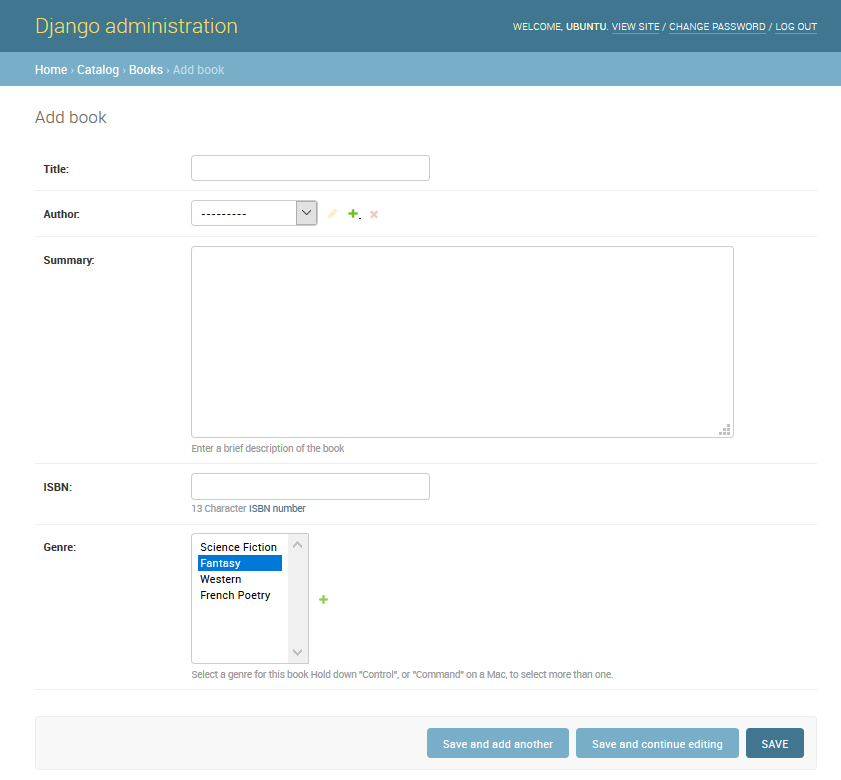
Click on the Add link to the right of Books to create a new book (this will display a dialog much like the one below). Note how the titles of each field, the type of widget used, and the help_text (if any) match the values you specified in the model.
Enter values for the fields. You can create new authors or genres by pressing the + button next to the respective fields (or select existing values from the lists if you’ve already created them). When you’re done you can press SAVE, Save and add another, or Save and continue editing to save the record.
Advanced configuration
Django does a pretty good job of creating a basic admin site using the information from the registered models:
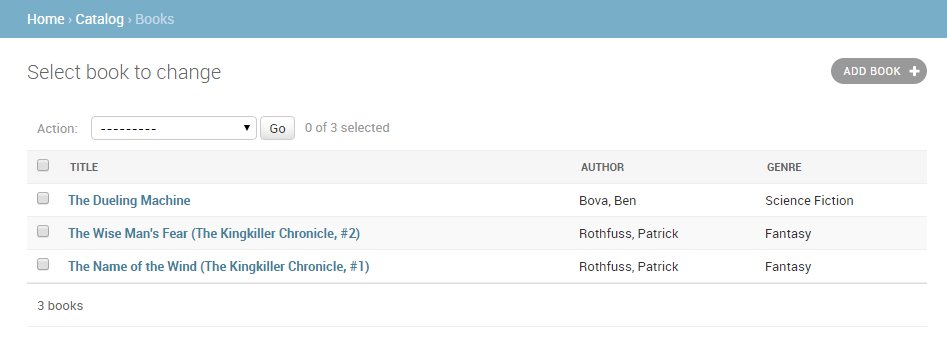
- Each model has a list of individual records, identified by the string created with the model’s str() method, and linked to detail views/forms for editing. By default, this view has an action menu at the top that you can use to perform bulk delete operations on records.
- The model detail record forms for editing and adding records contain all the fields in the model, laid out vertically in their declaration order.
Configure list views
The LocalLibrary currently lists all authors using the object name generated from the model str() method. This is fine when you only have a few authors, but once you have many you may end up having duplicates.
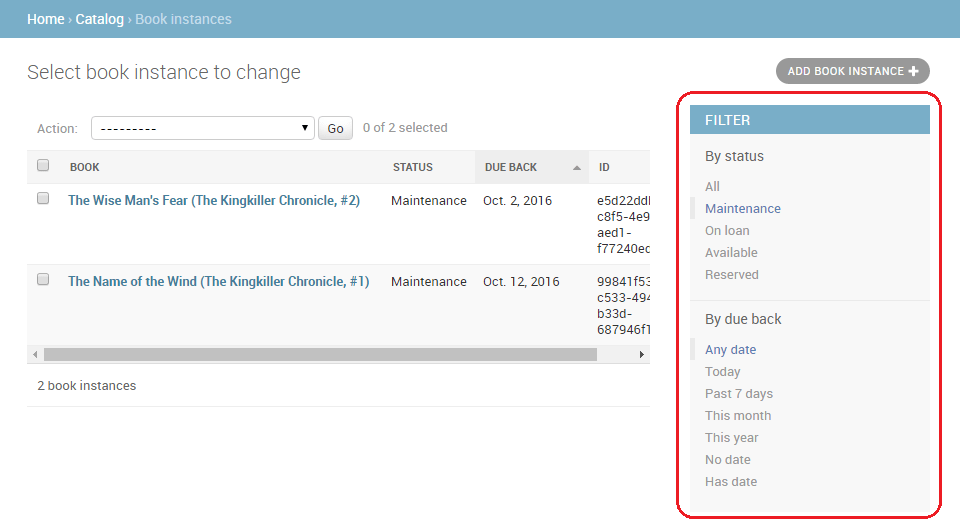
Add list filters
Once you’ve got a lot of items in a list, it can be useful to be able to filter which items are displayed. This is done by listing fields in the list_filter attribute. Replace your current BookInstanceAdmin class with the code fragment below.
Inline editing of associated records
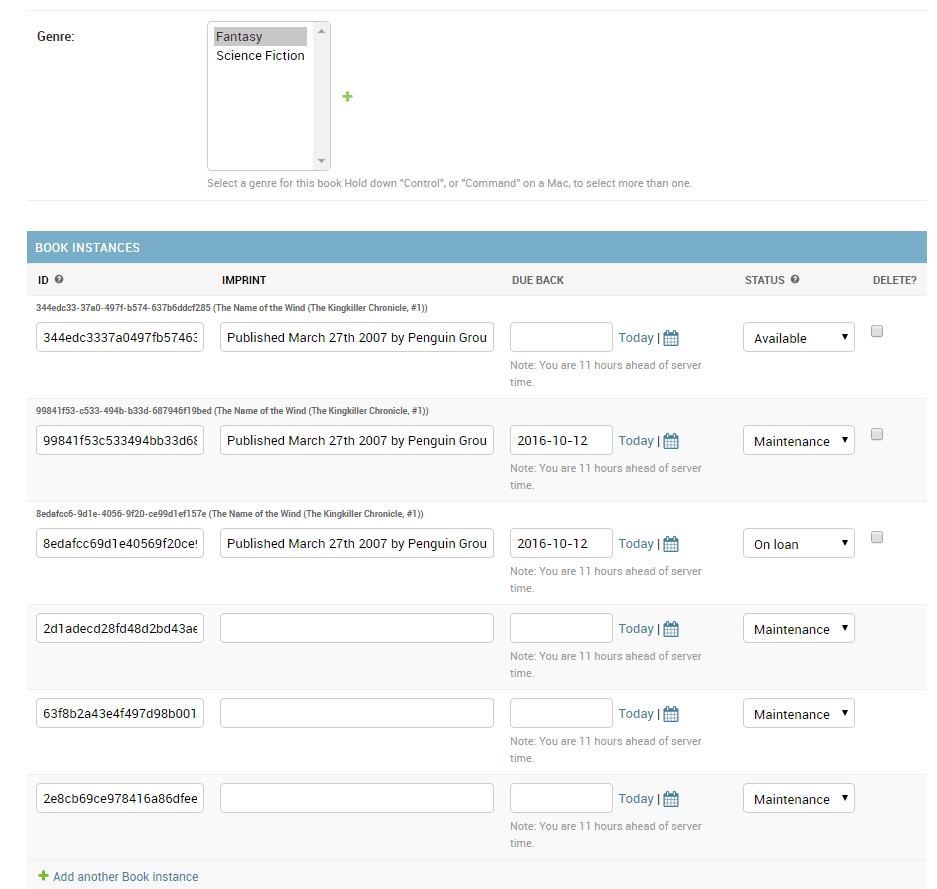
Sometimes it can make sense to be able to add associated records at the same time. For example, it may make sense to have both the book information and information about the specific copies you’ve got on the same detail page.
